Curried Shepherd's Pie
This curried shepherd's pie is just that good. It'll make even the humblest of chefs pretty damn conceited. It's comforting, filling and packs a ton of flavor - thanks to a generous amount of curry and cumin.
Read MoreFood. Drink. And all the things!
This curried shepherd's pie is just that good. It'll make even the humblest of chefs pretty damn conceited. It's comforting, filling and packs a ton of flavor - thanks to a generous amount of curry and cumin.
Read MoreRed curry paste is simmered in a creamy bechamel sauce for classic mac 'n cheese. The resulting taste offers a hint of curry with a subtly spicy finish.
Read MoreYou know The Boiling Crab's Whole Shebang sauce? Here it is... well, my version of it. It's bold, buttery, slightly lemony and slightly spicy. Prep is a cinch and it cooks in under 10 minutes.
Read MoreBalsamic reduction makes for a rich, tart mouthfeel, garlic adds a hint of spice, and the salty bite of the prosciutto and Parmesan is balanced with the freshness of the arugula.
Read MoreThese are my favorite cookies ever. It's not even because I like chocolate chip cookies. I love these cookies because of how happy they make my loved ones.
Read MoreBecause it's Thanksgiving Eve, I'm going to make this post a pretty quick one. I figure this recipe might be useful for tonight, when you need to rustle up a quick meal, or even the day after Thanksgiving, when you'll probably have random leftover vegetables.
Read MoreWe don't really have seasons in California. As much as I do love that, I sometimes yearn for colder weather -- an excuse to stay in inside to bake. There's something about staying in when it's cold outside with your oven fired up and your kitchen filling with the smell of baked scones.
Read MoreI'll admit it: I'm lazy. Although I try to be mindful to give ingredients the time and respect they deserve, I also try to cut corners whenever possible. This means blanching all my veggies in one pot -- regardless of color (and yes, I've blanched a whole beet, potatoes and peas all in one pot and had no trouble at all), and periodically reaching for the can of crushed garlic in my refrigerator (but don't tell anyone that shameful secret!). So I figured it only makes sense that I'd "cheat" my way through a potato chip recipe. Ordinarily, one would fry these in a big pot, but I try to bake rather than fry whenever possible. Usually, you can just leave the food in the oven and forget about it temporarily. Plus, it's healthier. When making potato chips, you have to slice the potatoes very thinly, about 1/8 of an inch. You may be able to do this with your trusty chef's knife, but I prefer to use a mandoline. It's much faster and more accurate. Just be careful you don't shave your fingers!

Serves: 4 Prep time: 5-10 minutes Cook time: 20-25 minutes
Ingredients: 2 large Russet potatoes 3 tablespoons olive oil kosher salt and pepper
1. Preheat oven to 400 degrees.
2. Wash and scrub the potato. Leaving the skin on, slice into 1/8" rounds.
3. Soak the slices in a bowl of water for a few minutes to rinse some of the starches off. Dry with paper towels.
4. In a clean bowl, toss the potato slices in olive oil. Arrange in one layer on a silicon baking sheet mounted on a sheet pan.
5. Sprinkle generously with salt and pepper. Bake for 20-25 minutes, or until the edges are golden brown. Sprinkle with salt again.
My Notes: Can I use additional seasonings? Of course! Be creative! When the chips are done baking, try sprinkling some cayenne pepper (for a spicy kick) or grating some Parmesan cheese over the top (because who doesn't love cheese?).
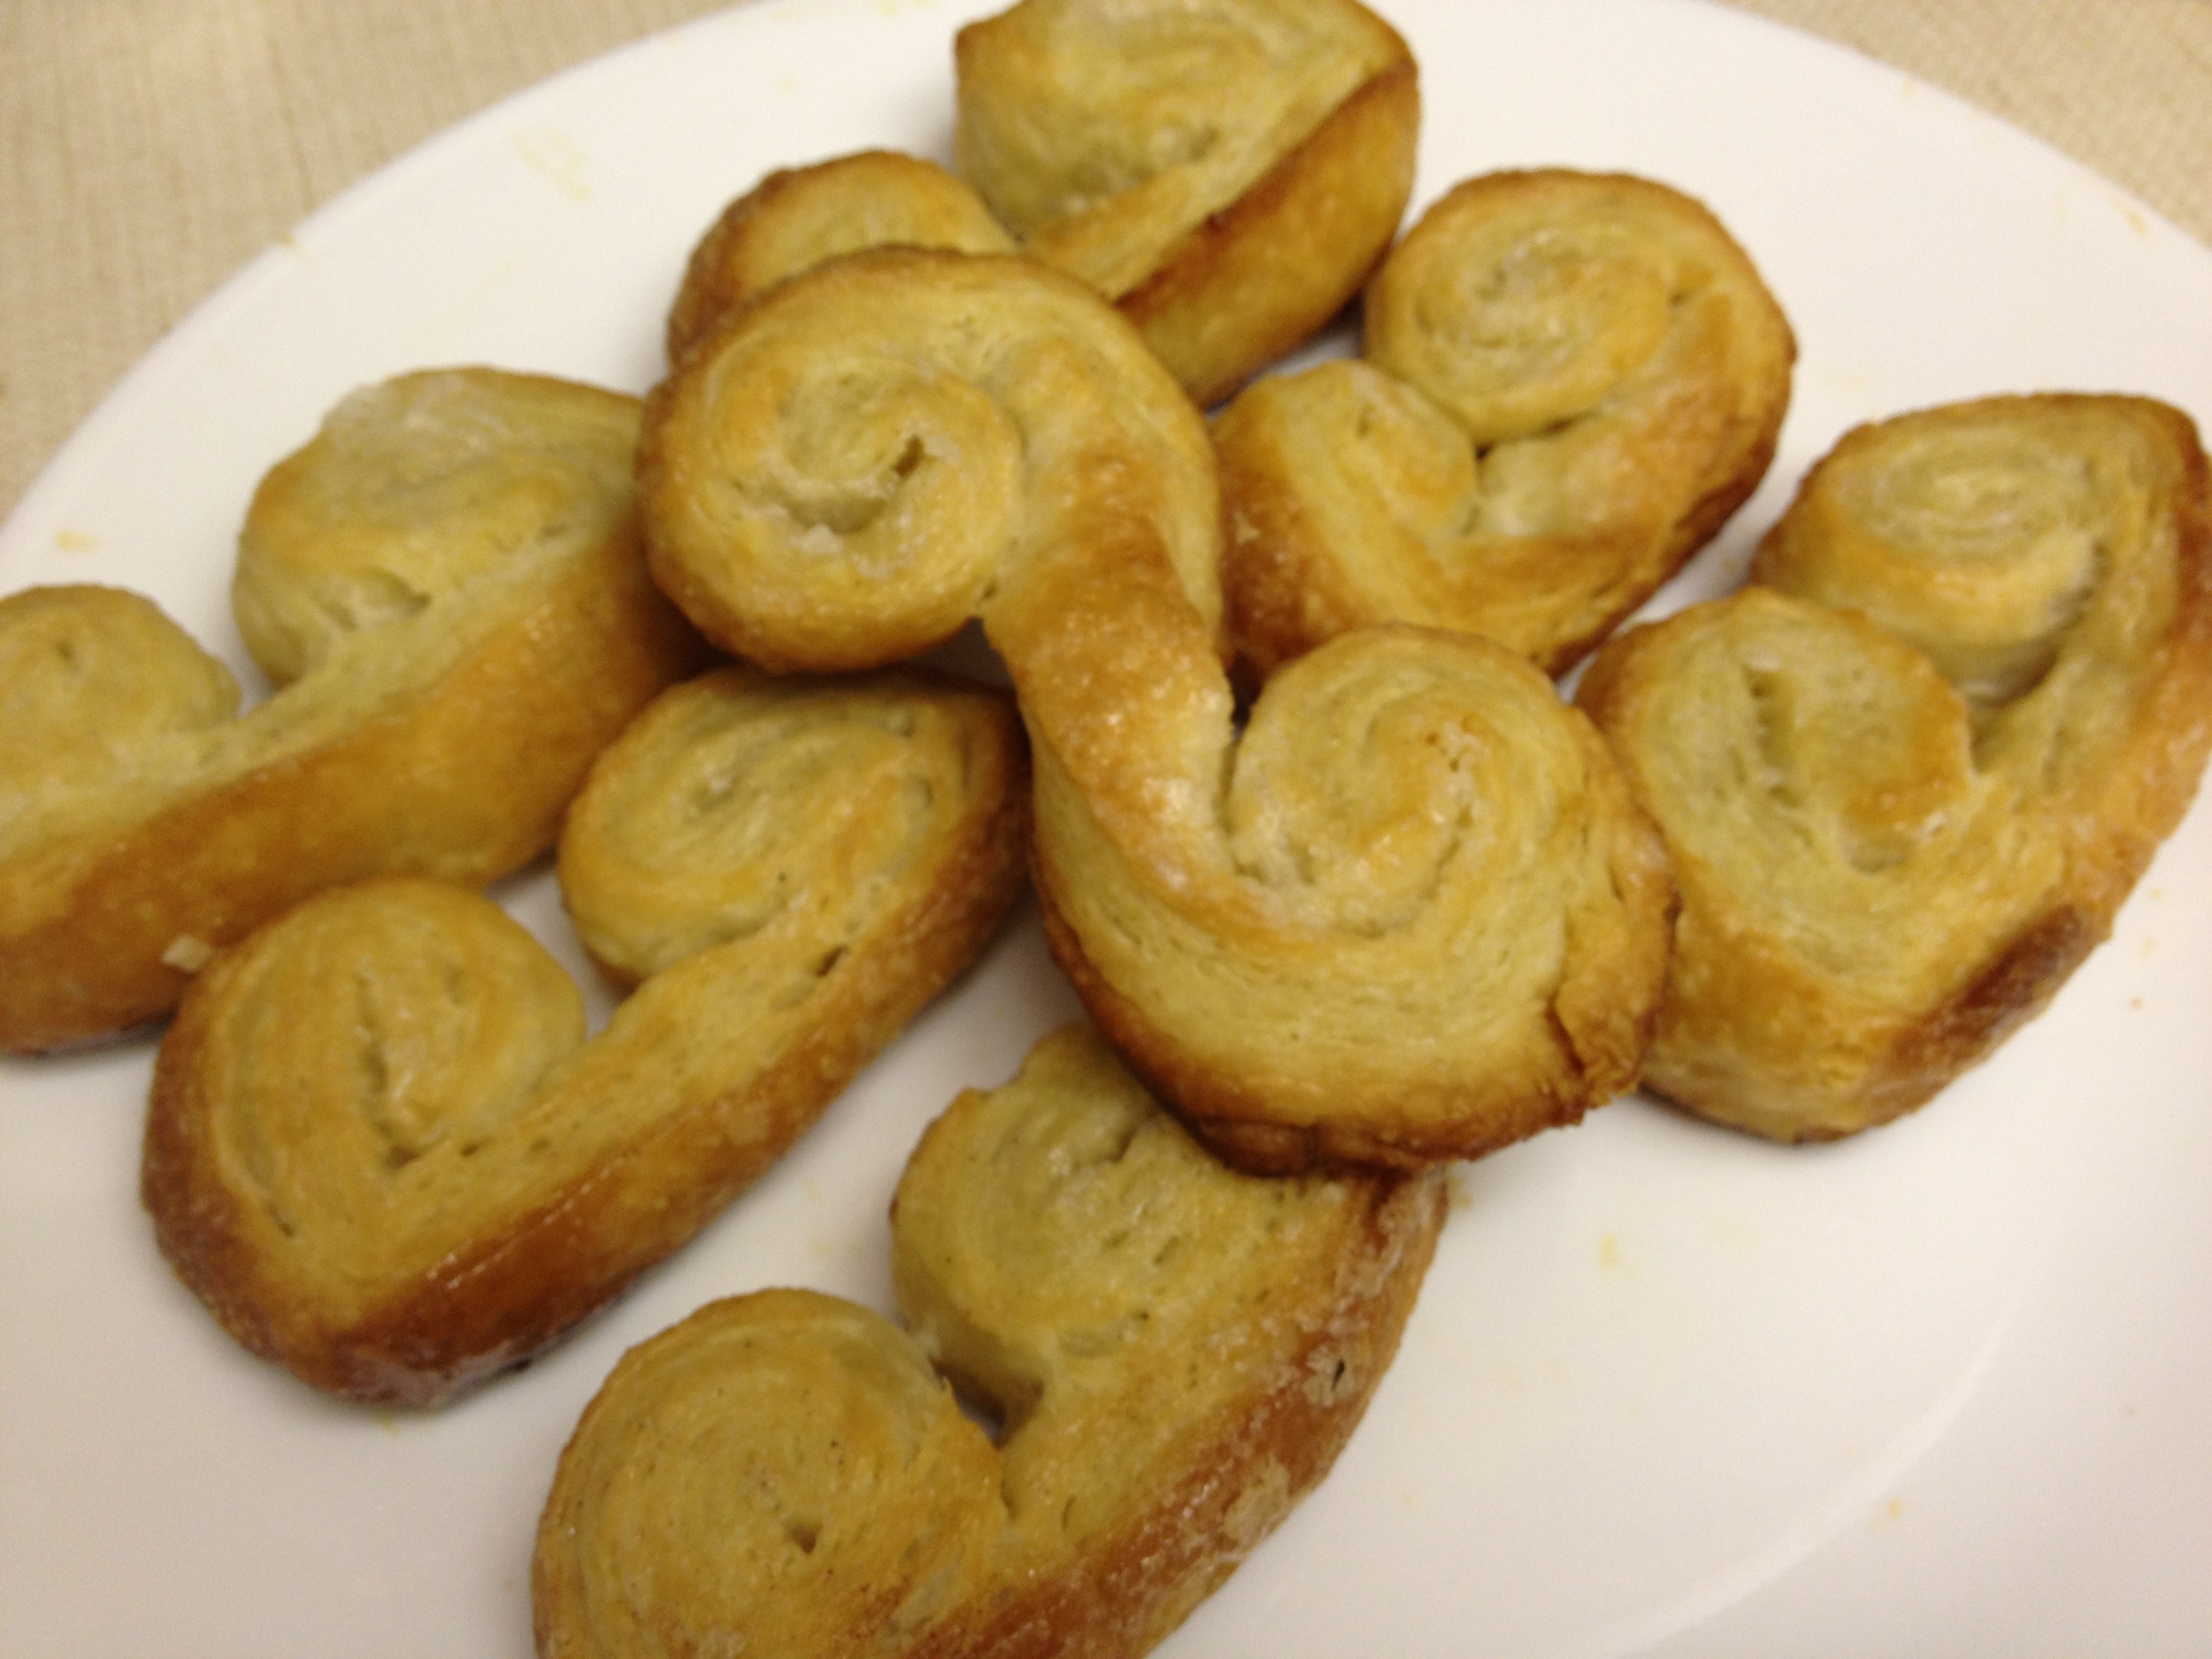
You know those really cute, really sweet, really crunchy cookies that are rolled up to look similar to elephants' ears? I don't like them. I don't understand their use. You never see them at parties and you never hear your girl friend say, "You know what sounds delicious? Elephant ears!" I can only imagine these cookies at a tea party, the guests obligingly biting into them after having scarfed down all the mini cucumber sandwiches and scones. And so, when my chef instructor at Le Cordon Bleu recommended we make these Palmiers puff pastries, I paid attention to her demonstration of preparing the cookies, but then blew it off mentally. Why don't I like these cookies, you ask? They're too sugary. They're too crunchy. You bite into one, and instantly, crumbs go flying about in every which way but into your cupped hand held up eagerly to catch the mess below your mouth. But alas, after class, I had more leftover puff pastry dough than I knew what to do with. (After all, I couldn't subject my arteries to making any more Brie en Croute.) So I decided to give these Palmiers a try. But I baked them at a lower temperature so they had a lightly crispy, totally flaky outer layer, but soft inside.

Serves: 12-16 cookies Prep time: 5-10 minutes Cook time: 20-25 minutes
Ingredients About 8 ounces Puff pastry dough - 1 store-bought sheet or homemade 1/3 cup sugar 2-3 tablespoons cinnamon A cup of water
1. Preheat oven to 375 degrees.
2. Roll out the dough into a rectangle, about 1/4" thickness.
3. Mark the middle lengthwise, just by putting a small indentation with your index finger.
4. Lightly coat the whole surface of the dough with water.
5. Mix cinnamon and sugar in a bowl and sprinkle over the whole surface of the dough, coating an even layer of sugary oodness.
6. Gently roll up each side of the puff pastry dough to that middle indentation point. Leave a 1/4-1/2" space in the middle,
7. Slice the dough in 1/2" pieces, then move to a parchment-lined baking sheet, laying them on their sides.
8. If you have some leftover cinnamon-sugar, you can sprinkle it lightly onto the cookies.
9. Bake cookies until light golden brown, about 20-25 minutes. But to be safe, check them at 15 minutes.
My Notes: What if I want crunchier cookies? For a crunchier cookie, bake them at 425 degrees until golden brown. This will take less time, of course, and will likely be finished in 8-10 minutes.
This is one of the few recipes that takes two basic foods that foodies love -- bread and cheese -- and folds them together into a super yummy, elegant treat. As a warning, this is not for the health conscious. I figured after all my recent posts about Nicoise salad, kale chips and a green smoothie, I was long overdue for a rich, cheesy, gourmet recipe. Call it by its original French name, Brie en croute (or "Brie in pastry case"), if you like, but for your guests who will stare at you blankly, you can just call this baked brie in puff pastry. If you're in a time crunch and planning a party, this Brie en croute can be done in a snap. Save time with store-bought puff pastry, or read on to learn how to make your own.
")
Serves: 8-10 Prep time: 5 minutes (when using pre-made dough); or about 50 minutes (when making dough from scratch) Cook time: about 20-25 minutes
Ingredients: For the dough: Homemade puff pastry dough
OR
1 store-bought puff pastry sheet 1 egg, beaten (for eggwash)
For the cheese filling: 2 4-ounce wheels of Brie cheese OR 1 8-ounce wheel of Brie cheese
For serving: Crackers (optional)
1. Preheat oven to 350 degrees. Unwrap dough.
2. Roll out the finished or store-bought pastry puff dough to slightly more than 1/4" thickness. Using a ruler as a guide (if needed), cut two 5" squares, or one 10" square.
3. Place each wheel of Brie cheese onto the square(s). (The 5" squares get the two 4-ounce cheese wheels; the larger, 10" square gets the one 8-ounce cheese wheel.) Gently fold each corner/flap of the square onto the middle of the cheese wheel. Brush with eggwash. Flip over and place on baking sheet lined with parchment paper. Brush with eggwash all over.
4. Bake at 350 degrees until the puff pastry is golden brown all around, about 20-25 minutes. Every oven is different, though, so be sure to check on it at the 15 minute mark! When it's finished, allow to cool slightly before serving.
5. If desired, serve with crackers.
My Notes: Why use eggwash? The eggwash gives the pastry that lovely golden sheen. Plus, it acts as a sealing agent.
Why fold the dough 2-3 times? Puff pastry is a pretty complex dough, one that needs to be folded repeatedly in order to correctly (and beautifully) flake.

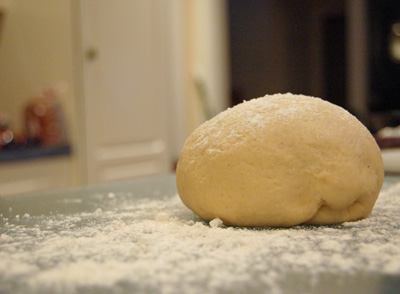
I've been yammering on and on about Brie en croute and Elephant Ears, offering recommendations for both store-bought puff pastry and homemade. Naturally, the store-bought variety hardly stacks up against the homemade real deal, but that doesn't mean you can't cut corners once in a while. If you're hosting a party with little time to prepare for it, by all means, buy the dough. It isn't expensive, anyway. But if you would like to make your own or perhaps even just have an understanding for how puff pastry dough is made, read on.
Ingredients: 1 1/2 cups all purpose flour 1/2 cup (or 2 sticks) unsalted butter, cubed (about 1/2″ cubes) Pinch of kosher salt 1/2 cup cold water 1 egg, beaten (for eggwash)
1. Sift the flour. Add to standing mixer with hook attachment, mixing on low. Slowly add the cubed unsalted butter. Add a pinch of kosher salt. Add the cold water. Let mix until most of the dough is clumped onto the hook. There should be visible chunks of butter in the dough.
2. Sprinkle your wooden board (or clean counter top) with flour. Gently roll out the dough into a rectangle, to about 1/4″ thickness.
3. Arrange the dough long-ways (like a placemat). Fold up the left and right sides to the center (like window shutters). Then fold it in half like a book.
4. Cover with plastic wrap and place in refrigerator to rest, about 1 hour or even overnight.
5. Roll it out into a rectangle again. Repeat Step 3. Cover with plastic wrap and place in refrigerator to rest, about 30 minutes to an hour. Repeat once more.
6. It’s done! After you have rolled and folded your dough 2-3 times, it’s done. Allow it to chill and rest another 30 minutes to an hour before starting the Brie en croute.
Kale chips -- they're delicious! I swear! Lately, I've been keeping an eye out on healthy meal choices (hence my recipe for a Green Smoothie) partly because of the disapproving looks I get from my boyfriend whenever I bury my face in a bag of Tapatio-flavored Doritos ("You're not better than me!" I cry as I return to my chips, sinking into a spiral of shame), and partly because of the super-yummy but rich and fatty dishes I've been learning to make at culinary school. I had been hearing about these crispy kale chips for awhile now. Heck, just about every food blogger has a recipe. (I'm partial to the one from For The Love Of Food, mostly because of the pictures.) I was excited to try them out, but didn't have particularly high expectations because, to me, nothing can ever replace Doritos... or Flamin' Hot Fries. And wow. Wowowow. Delish. Megish. Indeed. They're really crunchy, super light, savory, earthy, salty, nutty. These aren't lame diet bagel chips. Or bland, unsalted raw nuts. These are the real deal potato chip alternative. Without further ado, the recipe for baked kale, oven-roasted kale, crispy kale, kale chips -- whatever you want to call them:

Serves: 2 Prep time: 2-5 minutes Cook time: 10-15 minutes
Ingredients: 1 bunch kale (the curly kind, about 4-5 stalks) 1 tablespoon olive oil 1/2 teaspoon salt Cayenne pepper (optional)
1. Preheat oven to 350 degrees. Start with dry kale. Otherwise, they'll turn out soggy. Either wash the stalks hours beforehand, or pat to dry and make sure there's no visible moisture. Rip leaves off stalks.
2. Toss in olive oil. The kale shouldn't be fully covered in olive oil, just a very light coat.
3. Place kale on a baking sheet lined with parchment paper or silicon baking mat. Bake in oven until the leaves' edges brown slightly, about 10-15 minutes. My oven tends to run a bit on the hotter side, so I bake mine for 10 minutes.
4. Set aside to cool, about 1 minute. Sprinkle with salt and if desired, cayenne pepper.
My Notes: What if I overcook the kale? Hey, it happens. It'll have a bitter, burnt flavor. Be sure to check your kale at the 8-minute mark. When the curly edges look brown, they're done. They should have a light, crispy, papery texture.
Can I use cooking spray instead of olive oil? You sure can! Some might say this would be a fewer-calorie-alternative. I just tend to shy away from foods that come in spray cans. It's a personal bias. Plus, I like the vaguely fruity, clean taste of olive oil.
Can I use other seasonings? Yes! The sky's the limit. When I'm in need of a spicy snack fix, I dust on some cayenne pepper. If you're introducing this recipe to a reluctant friend, try sprinkling on some freshly grated Parmesan cheese.
Recently, at a friend's BBQ, someone made these incredible mini apple pies. They were comforting, homey, crunchy, sweet -- everything a good pie is. Even though I was full, I scarfed down a few of these suckers, unable to contain myself. Between mouthfuls of pie, I vowed I was going to make these at home. But then I recalled watching my friend make them. Dough, eggwash, pie filling, apples, spices and flour were spread all over the counter as she hurriedly filled and pressed together pieces of dough. It looked like... So. Much. Work. Don't get me wrong -- the pies came out perfect. They were little, golden, crusty pockets of heaven. But between working full-time and going to school every evening, I wouldn't be able to justify spending several hours on pie, particularly when much of the labor is in the assembly process. So I cut a few corners, partially working off the back of my Pillsbury pie crust box and this recipe from Smitten Kitchen. My recipe includes both an apple pie filling and a peach pie filling. Read on and you'll learn how to make these mini pie cookies in no time.

Serves: About 6 Prep time: About 45 minutes Cook time: About 25-30 minutes
Ingredients: 1 9-inch roll of Pillsbury Refrigerated Pie Crust 1 egg, beaten 1 teaspoon water
For apple filling (for 6 mini pies): 1-1.5 Golden Delicious or Granny Smith apples 1/4 cup white sugar 2 teaspoons ground cinnamon 1/4 teaspoon ground nutmeg Small pinch of kosher salt (less than 1/4 teaspoon) A few squirts lemon juice, optional (to prevent apples from browning)
For peach filling (for 6 mini pies): 1 8-ounce can peaches 3 tablespoons white sugar 1 teaspoon ground cinnamon
1. Preheat oven to 350 degrees.
2. Prepare pie dough: Roll out the pie crust to about 1/4 inch thick. Get two differently sized cookie cutters (or drinking glasses) and cut out little circles. Cut out six 3" circles and six 3.75" circles.
3. Prepare eggwash: Beat the egg in a small bowl. Add 1 teaspoon water and mix.
4. Create apple filling: Mix sugar, cinnamon, nutmeg and salt in a bowl. Peel and chop apples into little squares (about 1/8" thick, 1/4" squares). If they start to turn brown, squirt with some lemon. Toss apples into the sugar-spice mixture.
4. Or create peach filling: Drain the peaches. In a bowl, combine with sugar and cinnamon.
5. Assemble the mini pies: Put some water in another small bowl. Roll up a paper towel and dip it in the water. Moisten a 3" circle of pie crust with the paper towel. Spoon a small amount of filling onto the circle. Cover with a 3.75" circle of pie crust and press the sides to close. Crimp the edges with a fork. If desired, cut three little slits on the surface of the mini pie (refer to picture.) Repeat on all the dough.
6. Brush each mini pie with egg wash. Place pies on a baking sheet lined with parchment paper or silicon baking mat. Bake in oven until light golden brown, about 20-25 minutes.

My Notes: Why Golden Delicious or Granny Smith apples? These apples are pretty sturdy, so their firm texture holds up during the baking process. Plus, they both have a crisply tart taste. Golden Delicious apples tend to be a bit sweeter, while Granny Smith ones tend to be more on the sour side. Simply choose the variety you prefer.
Why canned peaches? Aside from requiring less preparation time and effort, canned peaches are much softer and sweeter than the fresh kind. As a result, you'll have a gooey, sweet filling for your mini pies.
But the Pillsbury Pie Crust box says to use a baking time of about 425 degrees: Baking these tiny pies at a lower temperature ensures they get cooked through and reach a lovely golden brown before getting a chance to burn.
Why use egg wash? This egg-water mixture provides a glossy finish to the pies, and helps keep them from burning.
Can I use different filling? Of course! You can use whatever filling you'd normally use in a pie.
What do I do with any extra filling? Um... eat it!
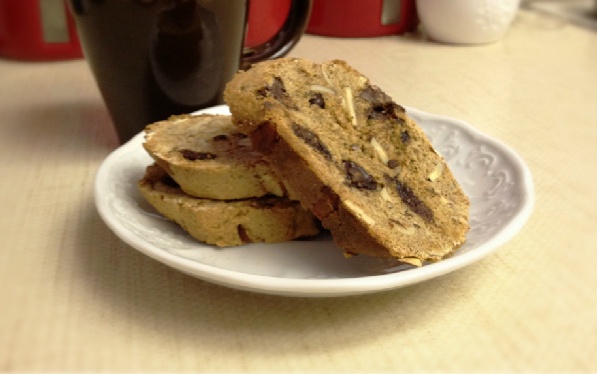
I don't know about you, but whenever I have coffee, I have the irresistible urge to drink it with something sweet. Cookies. Pie. Cake. So every morning I either finish my coffee with an unsatisfied sweet tooth or a guilty conscience, knowing full well I wasted too many calories on some store-bought pastrty. To avoid these feelings of unfulfillment and self-loathing, I did a quick search for a healthy biscotti recipe and struck gold. This MyRecipes recipe calls for whole wheat flour and flaxseed but don't worry -- there are still dark chocolate and almonds. The best part? Each crunchy cookie is less than 100 calories (and offers a decent dose of protein and fiber)...

Makes: About 30 cookies Prep time: About 30 minutes Cook time: About 35 minutes
Ingredients: 2 cups whole wheat flour 2 tablespoons flaxseed 1/2 teaspoon baking soda 1/4 teaspoon kosher or sea salt 1/3 cup white sugar 1/3 cup dark brown sugar 2 large egg whites 1 large egg 1 teaspoon vanilla extract 1 teaspoon almond extract 2/3 cup dark chocolate chips 3/4 cup unsalted sliced almonds
1. Preheat oven to 350 degrees.
2. Combine flour, flaxseed, baking soda, and salt in a bowl, stirring with a whisk. Using a mixer, combine sugars, egg whites, and egg in a bowl, and beat at high speed for 2 minutes. Add vanilla and almond extracts. Add the dry mixture (flour, flaxseed, etc.) to sugar-egg mixture; stir until combined. Fold in chocolate and almonds.
3. Divide dough into 3 equal portions. Roll each portion into a 6-inch-long roll. Arrange rolls 3 inches apart on a baking sheet lined with a silicon baking mat or parchment paper. Bake at 350° for 22-25 minutes or until firm and light golden brown.
4. Remove rolls from baking sheet; cool 10 minutes on a wire rack or separate plate. Using a serrated knife, cut rolls diagonally into 30 (1/2-inch) slices. Place back onto the baking sheet, cut sides down.
5. Bake at 350° for 5-6 minutes, turn cookies over, then bake additional 5-6 minutes. Cookies should be slightly soft in center. Remove from baking sheet; cool on wire rack or separate plate. Cookies will harden when they cool.

My Notes: Why use a serrated knife? This is especially important because the sharpness of a serrated knife easily cuts through the crunchy but yielding cookie loaf. You need only very little pressure to slice through. If you used a chef's knife (yes, even a sharp one), you'd have to exert more force and run the risk of crumbling the cookies.
Why use almond extract? The whole wheat and flaxseed are enough to overwhelm the nutty flavor, so adding a bit of extract livens it up. If you don't have almond extract, try 2-2.5 teaspoons vanilla extract.
Whole or sliced almonds? The original recipe seems to call for whole almonds, but I find them to be unwieldy in such a small cookie. Sliced almonds are not only easier to eat, but easier to fold into the dough.
Why change the baking temperature? I chose not to lower the temperature when I baked the cookies the second time because I wanted to ensure a crispy, crunchy texture -- not a stale one. Lower temperatures mean slower cooking time, which gives the dough more time to cook slowly and softly.
Warning: for chocolate lovers only. This recipe was so easy, so delicious, I mastered it in one try. The result is a sweet, soft chocolate cupcake with a glossy, smooth chocolate ganache top. I'll have to credit Giada de Laurentiis with this one, though I'm proud to say my version has a few substitutes, ricotta cheese and a little extra sugar. Though this cake may take awhile -- about 3 hours total, including prep, cooking and cooling time, it's sure to be a party favorite. The recipe makes at least two dozen treats that your friends won't be able to turn down.

Makes: About 25 Prep time: About 1 hour Cook time: About 1 hour
Ingredients: Cupcakes 5 ounces unsweetened chocolate, chopped 1 cup water 1/2 cup ricotta cheese, at room temperature 2-1/4 cups sugar 1 cup vegetable oil 3 large eggs 1 tablespoon pure vanilla extract 3 cups all-purpose flour (sifted, preferably) 1 teaspoon baking soda 1 teaspoon fine sea salt 1/2 teaspoon baking powder 1 cup semi-sweet chocolate chips
Ganache 1 cup semi-sweet chocolate chips 2/3 cup heavy whipping cream 1 teaspoon vanilla extract 1 tablespoon sugar (optional)
1. Line cupcake pan with paper liners (or arrange foil cupcake wrappers on a baking sheet) and preheat oven to 325 degrees.
2. Combine the unsweetened chocolate and water in a small saucepan over medium-low heat. Stir constantly until the chocolate is melted, about 2 minutes. Cool for 2 minutes. Whisk in the ricotta cheese until the mixture is smooth.
3. Beat the sugar, oil, eggs, and vanilla in your mixer. Stir in the chocolate-ricotta mixture. Then add the flour, baking soda, salt, baking powder, and chocolate chips. Stir until just blended.
4. Transfer the mixture to a large mixing bowl with spout and pour into the cupcake pan. Alternatively, you can use an ice cream scoop or large spoon to add the mixture to your pan. Allow batter to rest for about 10 minutes.
5. Bake cupcakes for 20-25 minutes or until a toothpick inserted into the center of the cupcake comes out with a very thin -- barely visible -- layer of chocolate. Cool the cupcakes completely before dipping in ganache, about 1 hour.
For the ganache: 1. Combine the heavy cream, vanilla extract and sugar in a small saucepan over medium-low heat. Cook until small bubbles appear on the outside edge of the cream. Pour the hot cream mixture in a bowl, over the chocolate chips. Whisk gently until all the chocolate is melted and the mixture is smooth, about 2-5 minutes.
2. Dip the tops of each cupcake in the ganache and transfer to a baking sheet. Place the dipped cupcakes in the refrigerator to set, about 20 minutes. Allow cupcakes to return to room temperature before serving.
My Notes: Mine vs. Giada's: The first time I made this I had trouble finding mascarpone at the store, so I substituted it for ricotta cheese instead. Ricotta is light and airy and creamier than it is cheesy -- three very important elements when baking a goodie. Also, when I was making the ganache and taste-testing it, I felt it wasn't quite sweet enough. I prefer it with a tablespoon of sugar. If you choose to add it too, make sure you add it in the saucepan while you're heating the cream and vanilla in order to make sure the grains are incorporated well.
Why go semi-sweet and unsweetened? The reason it's a good idea to stick with the semi and un-sweetened chocolate is so you can control the level of sugar that goes into your cake. I love sweets just as much as the next person, but there's no greater buzzkill than when you realize you can't finish a cupcake because your teeth start hurting halfway through.
Why let the cupcakes "rest?" I learned this one from Giada! Allowing the batter to sit in the baking pan before popping it in the oven results in puffier cupcakes. This recipe should result in a puffy top so it best holds the ganache -- plus, you want a wider surface for that sweet chocolate casing.
When do I use foil cupcake wrappers? When you don't have a cupcake pan, of course. I only have one cupcake pan so sometimes it's easier for me to use the foil wrappers and arrange them on two baking sheets rather than waiting for my first batch of cupcakes to cool before baking the next one.
In seeking out new, tasty recipes, you'll probably find that constantly whipping up rich and creamy foods gets old pretty fast. Sometimes you just want something a little lighter, and this spinach and ricotta-parmesan stuffed shells is just the meal. I'll admit, it requires a considerable amount of prep and cooking time, but it's got plenty of easy-to-use ingredients that make the time whiz by. I found this recipe on EatingWell.com, but added extra ingredients here and there to achieve the tomato-laden, cheesy goodness of a gourmet baked pasta.

Serves: 6-7 Prep/cook time: 1.5-2 hours
Ingredients: 24 jumbo pasta shells, (8 ounces) 2 teaspoons extra-virgin olive oil 2 onions, finely chopped 2 pounds fresh, trimmed spinach, or two 10-oz packages frozen chopped spinach, thawed 2 cups part-skim ricotta cheese 3/4 cup freshly grated Parmesan cheese, divided 1/4 teaspoon ground nutmeg 1 large egg white, lightly beaten 4 cups prepared marinara sauce, or two 8-oz jars 1 cup plain dry breadcrumbs Salt and pepper, to taste Optional: 1 can diced tomatoes with 1 teaspoon of sugar (if you want more marinara sauce)
1. Preheat oven to 375 degrees. In the meantime, boil water for your pasta, and be sure to add a few tablespoons of salt just before you drop the pasta shells in. Cook shells until al dente. Drain and rinse under cold water. Set aside.
2. Heat oil in a nonstick skillet over medium-high heat. Add chopped onions and cook until softened, about 3 minutes. Then add the spinach and toss to mix well, seasoning with a pinch of salt and pepper. If you're using fresh spinach, be sure to drain the excess moisture after you've washed and trimmed it. Then add it in batches, adding more as the cooked spinach wilts. Let cool and set aside.
3. Mix all the ricotta, breadcrumbs, 1/2 cup Parmesan and nutmeg in a bowl. Add your cooked onions and spinach and season with salt and pepper. Stir in egg white.
4. Stuff each the reserved shells with a generous 2 tablespoons of your cheesy-and-veggie filling.
5. Spread 1 1/2 cups marinara sauce at the bottom of a 9-by-13-inch baking dish. Arrange the stuffed shells in a single layer. Top with the remaining 2 1/2 cups of the sauce and sprinkle with the remaining 1/4 cup Parmesan cheese. Bake until the top has a nice, golden crust, about 30-35 minutes. Let cool for a few minutes before serving.
My Notes: Mine vs. EatingWell's: EatingWell has a ton of really great recipes -- you can search by low-sodium, low-carb, heart-healthy, you name it, it's there -- but some of them are too dry for my liking. I prefer pasta with a rich, hearty marinara sauce, and with the sharp, salty bite of Parmesan cheese. I added extra of both, and made sure to season my onion and spinach with salt and pepper. I also used more breadcrumbs for more crunch.
More marinara? If you really can't get enough marinara sauce, try adding a small jar of diced tomatoes to the mix. Make sure you counter the bitterness of the tomatoes with a teaspoon of sugar. A whole extra jar of prepared sauce is too much as it isn't likely to fit in your baking dish and would drown out the taste of the cheese.
Homemade dinner? Who actually has time for that these days? No matter the situation -- whether you work full-time, go to school full-time or take care of kids full-time -- there's always an excuse to grab the takeout menu and order your usual chicken teriyaki with brown rice. But this salmon recipe, adapted from Simply Recipes, may well be the quickest, easiest fish you'll ever make. Just 10 minutes of prep time (5 minutes, once you've mastered it!) and pop this sucker in the oven for several more minutes. It's so simple that if you mess up the ingredient proportions, you still wind up with a delicious baked salmon. It's healthy, it's elegant and it's oh-so-tasty.

Serves: about 4 Prep time: 5-10 minutes Cook time: 12-14 minutes
Ingredients: 1 slab of thickly cut, boneless salmon 2 tablespoons olive oil 4 tablespoons honey mustard dressing 2 tablespoons thyme (preferably fresh; I just used dried) 2 tablespoons parsley Salt and pepper to taste 2/3 cup panko bread crumbs
1. Preheat your oven at 400 degrees. Place the salmon on a lightly greased baking sheet, skin side down. Season with salt and pepper.
2. Whisk together the olive oil and honey mustard. Add thyme and parsley (keep whisking!)
3. Spoon mixture onto the salmon, making sure it's spread (at least somewhat) evenly. Sprinkle with a little more salt and pepper then finish it off with the panko on top.
4. Bake for 12-14 minutes, until the panko bread crumbs are a light golden brown and/or the salmon flakes when poked with a fork.
My Notes: Mine vs. Simply Recipes'. I first made this fish when all I had in my pantry was panko and a bunch of dried herbs. All I needed from the store was the honey mustard and salmon. I went ahead and bought honey mustard dressing (rather than the actual condiment) because I knew I could keep it in my fridge for a long time and use it to flavor homemade salads. I didn't bother buying paprika since I rarely cook with it; its absence also helps the thyme and parsley stand out on their own. As for the ingredient proportions, I felt the original recipe was a bit dry and bland. A few tablespoons more of honey mustard gives it the tangy, savory kick and the extra drizzle of olive oil helps the salmon stay moist.
Not too long ago, I tried this recipe with honey mustard (rather than just the dressing) and I definitely wasn't pleased with the results. The salmon ended up being more bland, and I realized the dressing complements the herbs much better.
What's panko? Panko is a Japanese bread crumb. The little, light yellow flakes have less sodium and carbohydrates than regular bread crumbs. You normally see it on tempura, and you can use it when making just about any food that requires breading. Best of all, panko is really easy to work with because it stays on food and it doesn't burn easily.